I see you, you nostalgic, art loving stationery aficionado! You are all about the added charm and color of vintage postage stamps. How can you not adore the extra luxe and story that those beauties add to a paper suite? I know I, for one, cannot resist. For years, I have been wondering the best way to find and assemble them. So, you can imagine my delight when Jessica offered to come back for another guest post all about vintage postage stamps! Enjoy, lovelies!!
Vintage postage stamps are some of my favorite ways to add color and character to wedding envelopes! I have a fun blog post all about my favorite sources for wedding postage if you’re curious about my other favorite types of wedding postage. But in terms of my favorite vintage stamps? They’re from Verde Studio!
While the question about where I source my vintage stamps is often the first question I receive, the follow up question is always – how do I assemble vintage stamps on my wedding envelopes? I normally assemble the vintage stamps for my brides, but if you are assembling them on your own – I wanted to share my top 3 favorite tips with you today!
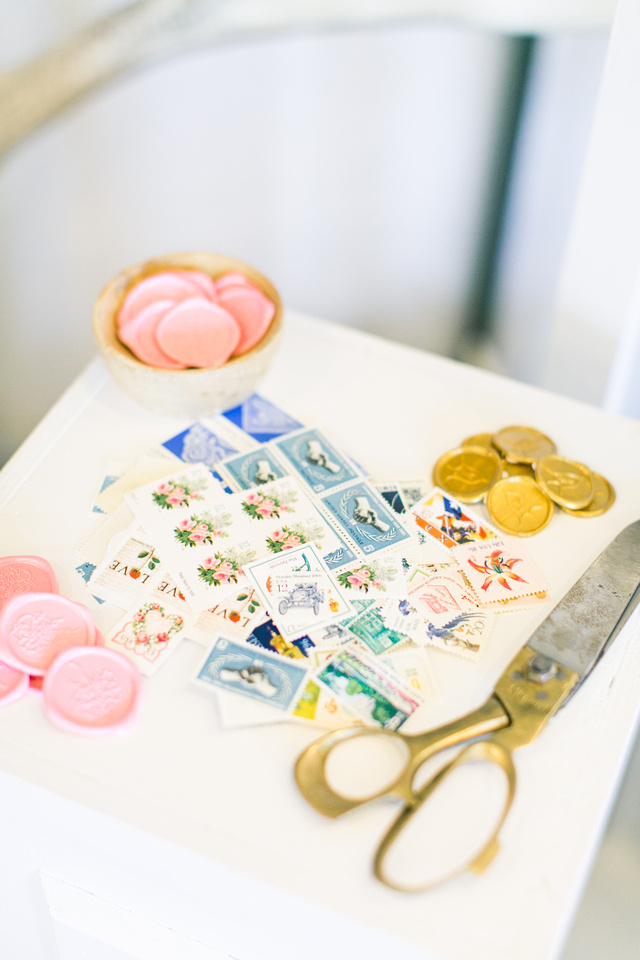
photo by Blue Barn Photography
TIP 1: INDIVIDUALLY TEAR YOUR POSTAGE STAMPS
Like current post office stamps, vintage stamps come in “books” – aka sheets of stamps. Rather than the peel-and-stick style postage books, many vintage stamps are perforated sheets that simply need to be torn into individual stamps.
When assembling your wedding invitations, I recommend tearing your stacks of vintage stamp books into individual postage stamps. This will make your overall assembly process much faster! If I’m working on a small order (ex: shower invitations with a quantity of 25 or less), I may opt to simply tear as I go. However, for orders over 25 – I always like to tear them individually first to save time in the long run!
Some vintage stamps do come in the more modern peel-and-stick style – so I leave those in the full booklets and peel as I go, since their adhesive is stickier!
TIP 2: CHOOSING THE BEST LAYOUT
Once I have my postage stamps individually torn and in piles based on stamp style, it’s time to select how my postage stamps will be organized on the mailing envelopes. Virginia (the owner of Verde Studio) is so amazing, and sends her recommendations about layout when she sends your order! But if you’re determining your postage stamp layout on your own, here are my tips:
- Arrange them from the largest stamps on the right hand side of the envelope, to the smallest stamps on the left. Not only is this a pretty aesthetic – but it also allows more room for envelope calligraphy in the center of your envelope!
- Stack horizontal stamps on top of each other. This tip is a space saver – especially if you’re using $0.90 worth of postage and have to fit 5-6 stamps per envelope!
- Consider color – while I always like to use the size rule as my guide, it’s also important to consider color when arranging your stamps! When possible, mix lighter colored stamps between any dark colors to add white space, and avoid putting two of the same colored stamps next to each other.
Pro tip: After you’ve selected your vintage stamp layout, physically organize your stamp piles in this order on your desk! This will help speed up your assembly process, and will take the guess work out of which stamp to grab next.
TIP 3: USE A GLUE STICK
If you’ve ever held vintage stamps in person, you may remember that the back sides have a slightly gummy adhesive. However, they are not incredibly sticky, and the vintage stamps themselves more often resemble thin paper than a coated stamp.
One of the more traditional ways to assemble and adhere vintage stamps to envelopes is to take a sponge, lay it on your desk, and then dab your adhesive side of your vintage stamp on the sponge, then attach it to your envelope. The water is supposed to activate the gummy adhesive. I’ve done this in the past, and it’s a tad messy, pretty time consuming, and not always reliable (some of the stamps started curling up after a while).
I’ve also tried using a double sided tape roller, but that is also a bit time consuming, and doesn’t allow all of the edges of the stamps to seamlessly stick to your envelopes.
So, my go-to way to assemble and adhere vintage stamps to envelopes? Glue sticks! Yep, that’s right, old school Elmer’s Glue Sticks – the disappearing purple kind. Don’t worry, the purple doesn’t discolor the envelopes if you accidentally get some outside the stamp area!
This trick is definitely the fastest and most secure assembly option – and it usually only takes one or two swipes of the glue stick per stamp based on the stamp size! I use the larger 0.77 oz size, which helps with making less swipes on the stamps!
*Please note: the peel-and-stick vintage stamps do not need glue sticks – their adhesive is strong enough to simply stick to the envelope without any extra help!
I hope this post was helpful! If you have any other vintage stamp questions for me, let me know and I’ll answer them in another blog post! I’ll be writing one soon about how to leave enough room on your envelopes for envelope calligraphy when using vintage stamps, and can’t wait to share more about that!
xoxo, Jenn (& Jessica)
Keep up with Jessica | Website | Shop | Instagram | Facebook | Pinterest


LIke it
pin it
tweet it
email it